Where does the test database go?
A test database can be local or remote, and there are good arguments for each. The simplest case is “Local Dev with Local DB”Local + Local

- It will be extremely difficult to match the exact version of the underlying OS and database with their production counterparts. E.g. the developer may be using MacOS, whereas production is almost certainly some version of Linux.
- It will be extremely slow and cumbersome to manage. If the database gets corrupted, it will require re-initializing the database.
- It will be very difficult to maintain consistency across developers. This is especially true if developers have their own software, and are managing their own laptops. Developers may waste precious time debugging issues which are specific to their environment, and do not affect production at all.
Cloud + Cloud
The cloud version of the “Local + Local” setup above this: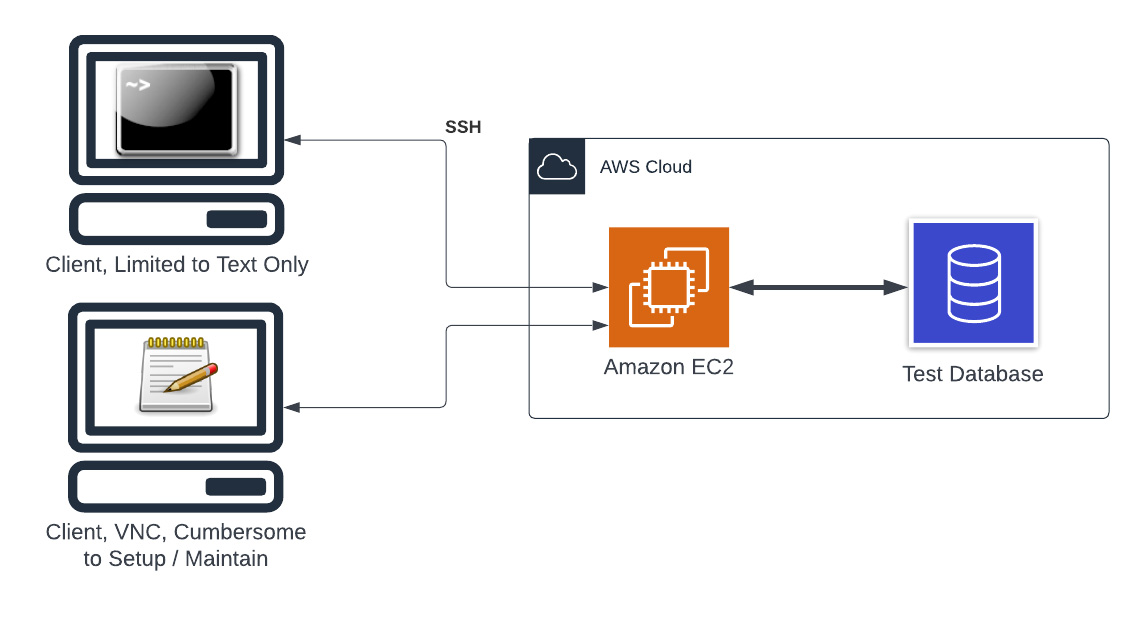 In this case, the development is taking place on an EC2 instance, and the code on the EC2 instance is talking to a database running on AWS. This can be anything from an RDS database, a Neptune instance, Aurora serverless, DocumentDB, etc. The point is that it lives in AWS. This situation is in some ways an improvement over “Local + Local”, in that this setup will be much more consistent with production. However, the ergonomics of this setup are not ideal. You either have to work over SSH, which is not for everyone. Or, you have to setup VNC, a Linux based GUI, and maintain that configuration.
Local + Docker(Local)
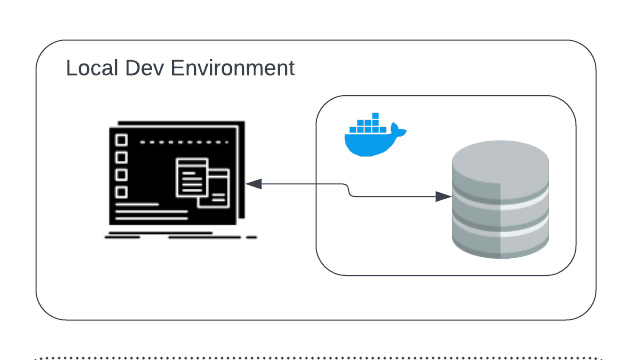 This is an improvement over Local + Local because the database is running inside a Docker container. With this setup, it ensures that all developers have access to a consistent database experience. This also makes it easy to reset the test database when it is inevitably corrupted during the development process.
The main disadvantage here is that it still needs to be maintained, and the developer must have some working knowledge of Docker to be comfortable with this setup. Also, this setup takes a bit of resources, especially if the database contains a large amount of data. This rules out development on lighter weight machines such as tablets or Raspberry Pi’s.
This is an improvement over Local + Local because the database is running inside a Docker container. With this setup, it ensures that all developers have access to a consistent database experience. This also makes it easy to reset the test database when it is inevitably corrupted during the development process.
The main disadvantage here is that it still needs to be maintained, and the developer must have some working knowledge of Docker to be comfortable with this setup. Also, this setup takes a bit of resources, especially if the database contains a large amount of data. This rules out development on lighter weight machines such as tablets or Raspberry Pi’s.
Local + Cloud
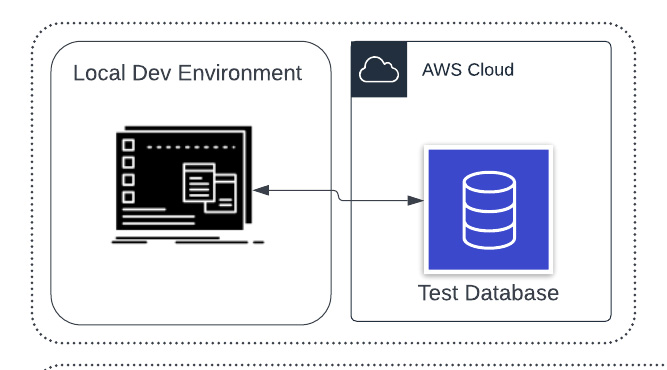 Another possible configuration is “Local + Cloud” where the code sits on the developers machine, but the test database is in the cloud. This approach can also work, but there are a few issues:
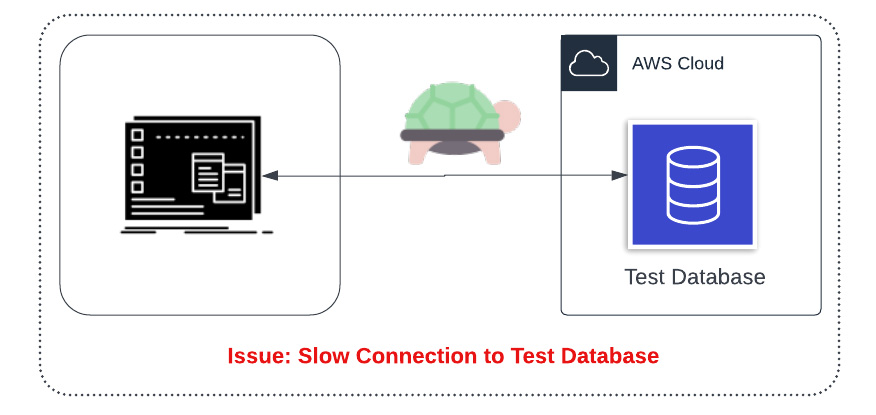 Issue 1: This puts the data-strain on the developers internet connection. In the modern remote-first work paradigm, developers may not always have sufficient bandwidth to work in this way.
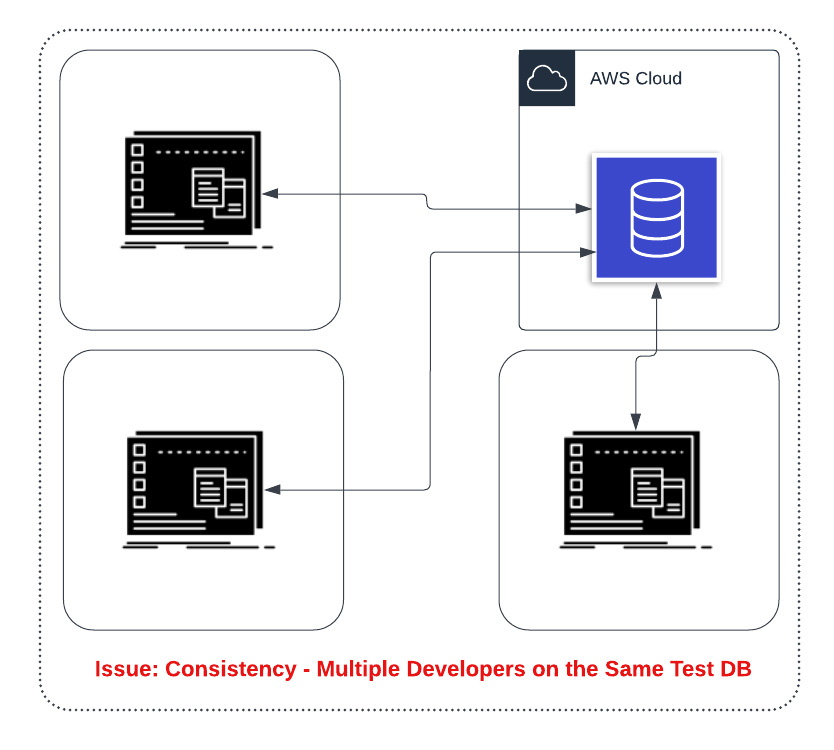 Issue 2: If you have multiple developers, you will most likely want multiple test databases. This is especially true if developers may be changing the schema.
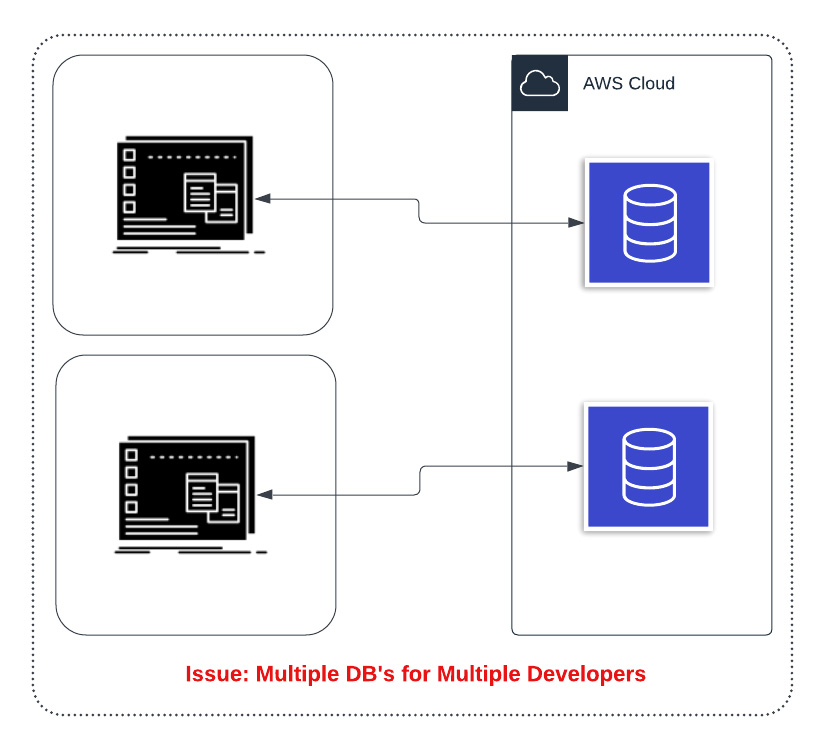 Issue 3: You can mitigate issue 2 by having one cloud database per developer. However, this can get cumbersome to manage and databases such as RDS and Aurora can take some time to instantiate. This approach may possibly be a good approach, but will require a substantial investment in tooling and automation to make it a good developer experience.
DevSpaces + Docker Database
When using DevSpaces, the DevSpaces workers can run additional Docker containers. This includes a database container. The architecture of this setup is as follows: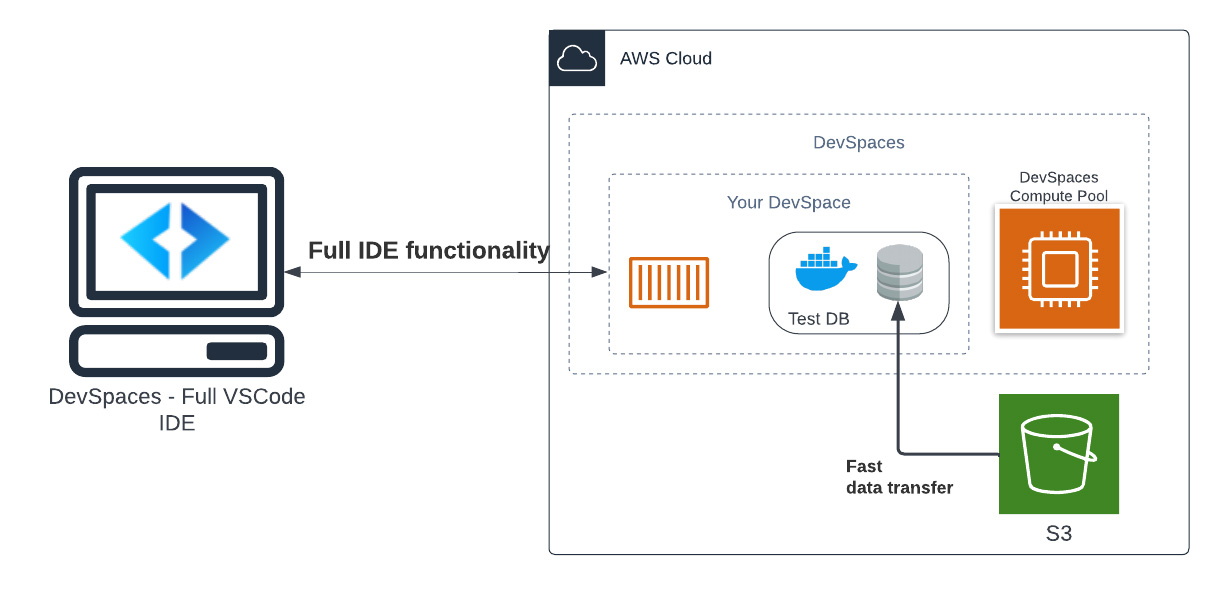 The idea behind this setup is that we can load the test data from an S3 bucket into a database running in a Docker container alongside the DevSpaces worker node. This solution is extremely fast, since both DevSpaces and the S3 bucket are living in the same AWS region. This means that data flow from S3 to the worker node is extremely fast.
Using this pattern also allows for, from the perspective of the developer, a very familiar pattern to be used, while also getting the benefits of a cloud-based workflow.
The idea behind this setup is that we can load the test data from an S3 bucket into a database running in a Docker container alongside the DevSpaces worker node. This solution is extremely fast, since both DevSpaces and the S3 bucket are living in the same AWS region. This means that data flow from S3 to the worker node is extremely fast.
Using this pattern also allows for, from the perspective of the developer, a very familiar pattern to be used, while also getting the benefits of a cloud-based workflow. Configuring a Docker-based Test Database
Alright, let’s make these diagrams into reality. We are using MySQL for this example, but the same techniques apply for any database.
The tasks that we need to accomplish are:
- Modify .gitpod.yml to start a MySQL database container
- Create a script to dump the database and save to S3
- Modify .gitpod.yml to load the database from S3
Starting a Database Container
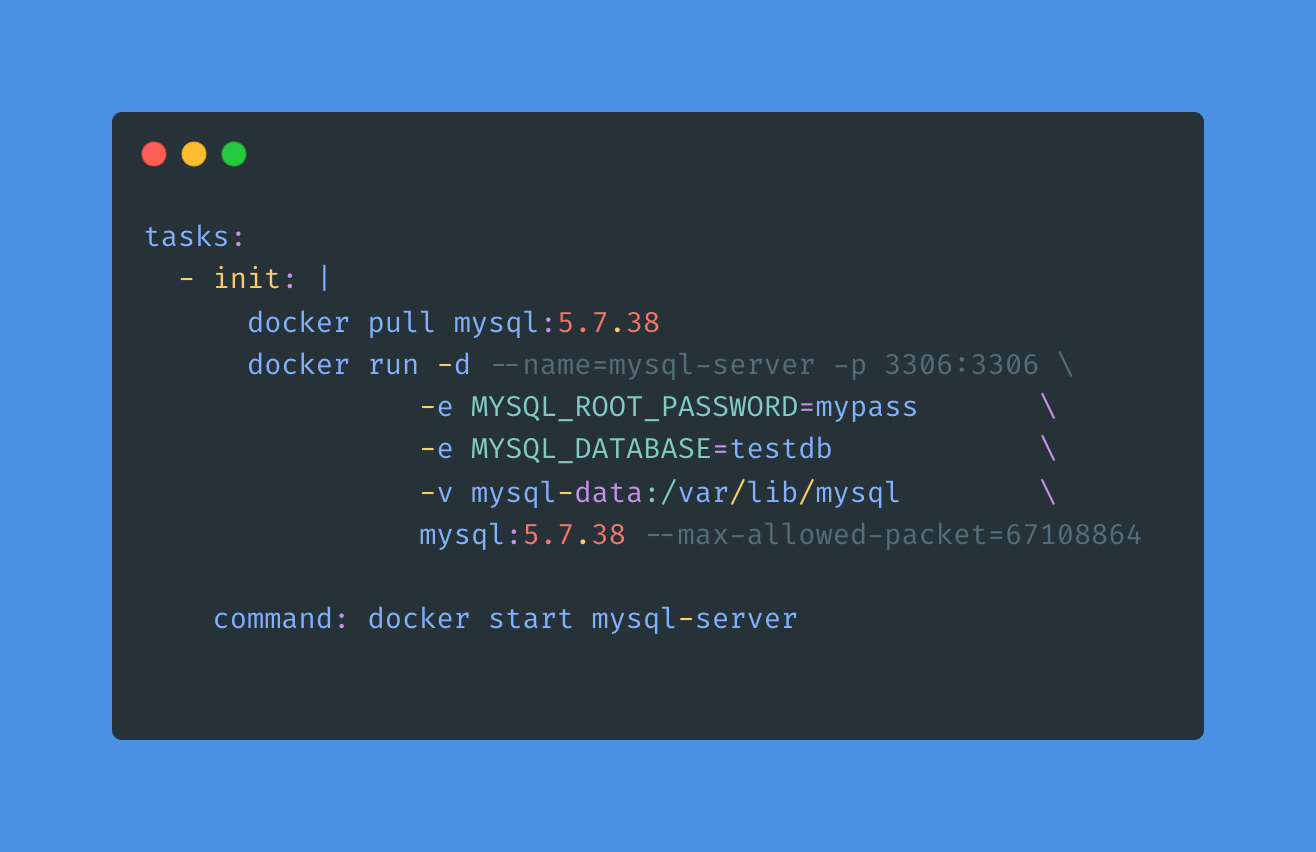
This is showing the tasks section of a gitpod.yml file. A task can have before, init, and command sections. Before is executed before init and the main command, and it is meant for setting up environment variables, credentials, and that sort of thing. init is run at the start of the workspace, and command is run every time the workspace starts.
In this case, we use the init section to pull a particular version of MySQL, and then we start the MySQL container. We are using environment variables to set the password of the root user. There are many different settings which can be configured at server start. These variables can be seen in the MySQL Docker image documentation.
We use the command segment to make sure that the mysql-server is always running. Having this as a command will also make sure that the database is started when a DevSpace is resumed from hibernation.
Dumping the Database to S3
The key to dumping the database is to have a backup tool and a restore tool. In the case of MySQL, we are using MyDumper. It provides 2 utilities, mydumper and myloader, which respectively backup and restore the database. For PostgreSQL, you would want to use pg_dump and pg_restore.
By importing a copy of the database, we are avoiding the onerous and potentially slow task of generating sample data. In Ruby on Rails, this may be done by a command like: rake db:seed. This additionally ensures that all developers are working off of the same test data, which is useful in debugging. Often sample data generators involve randomness, and this means that identifiers and particular values may be different from one developer to another.
In order to dump the database, we use a simple bash script. The script utilizes the AWS CLI. This requires environment variables to be configured with your AWS Access Key and AWS Secret Access Key. This is done by clicking on “Settings” in the top navigation bar of DevSpaces. Then, click on “Variables”. Click on “New Variable”. You will see a screen like:
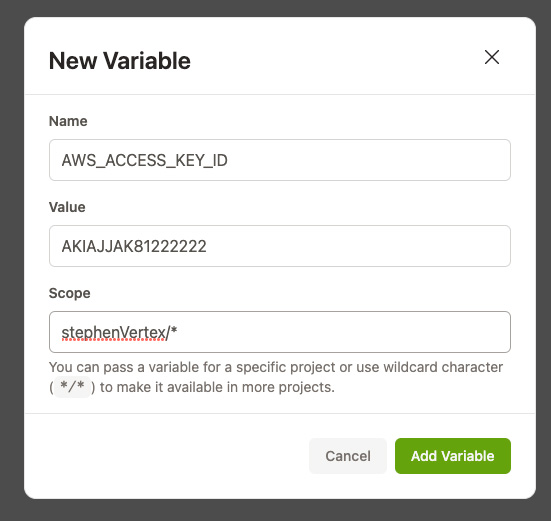
In the “Scope” field, you can enter a wildcard expression to match multiple repositories. All variables set here will be available in the DevSpaces shell for matching repositories. For AWS CLI to work, AWS_ACCESS_KEY_ID and AWS_SECRET_ACCESS_KEY must be set.
Once this is configured, a bash script like this can be run:
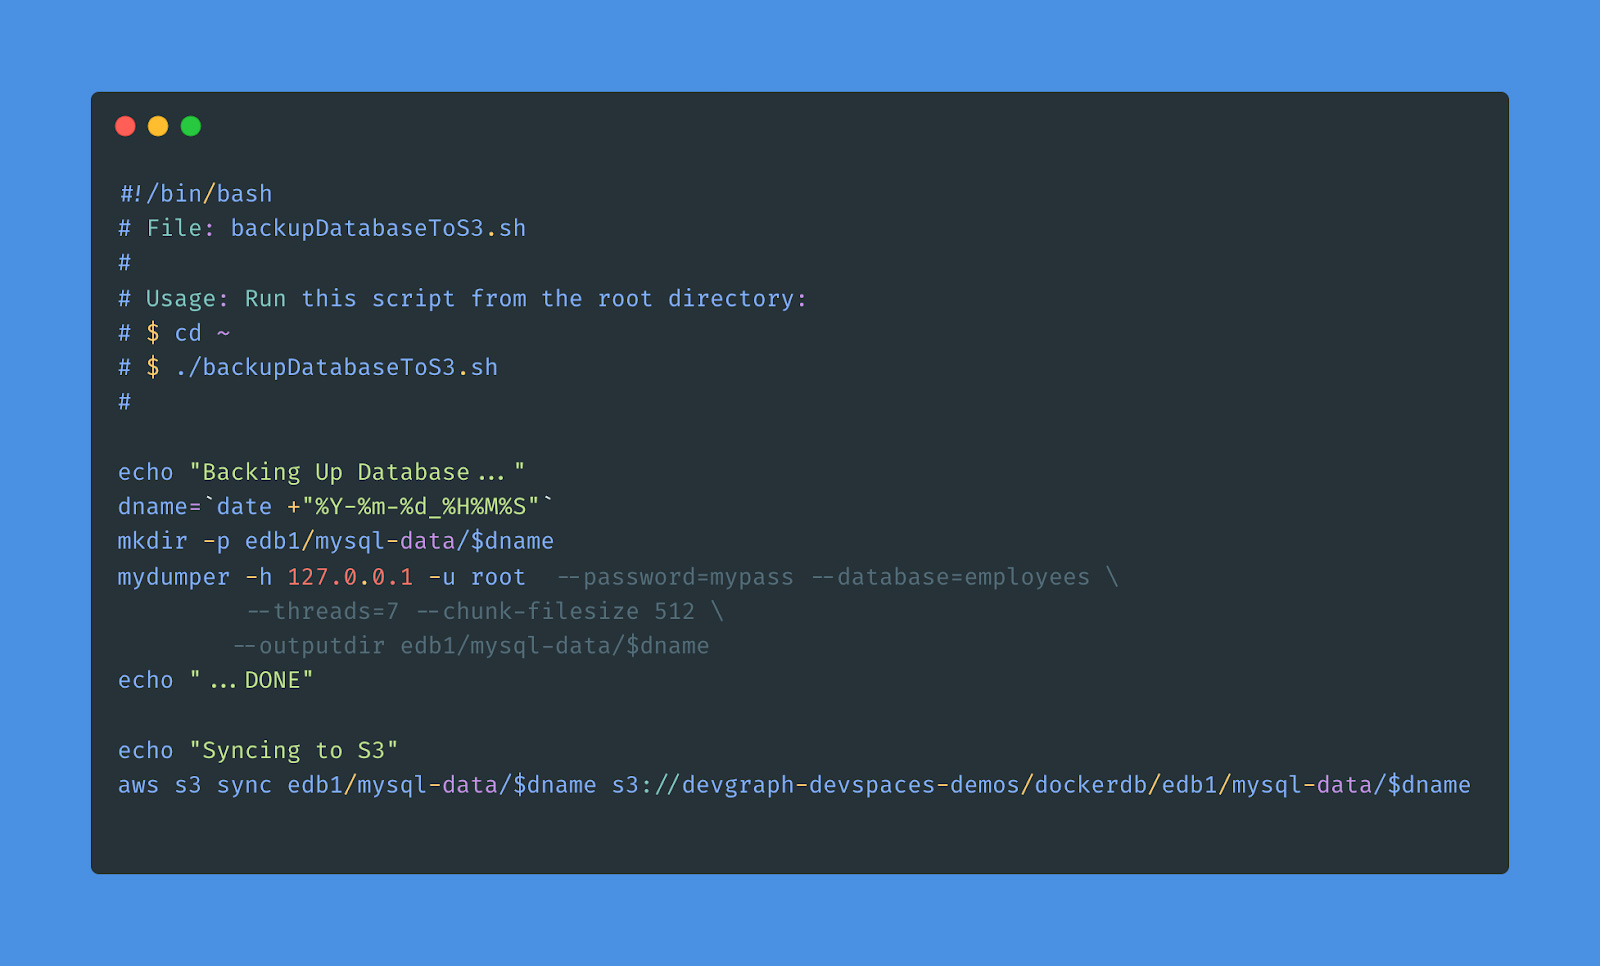
This script generates a timestamp, makes a directory, and then calls mydumper to output the database to that location. Next, it uses s3 sync to upload the files. Note that we are not using compression, as we are optimizing for load speed rather than bandwidth usage.
Once this script is run, a backup of the database will be uploaded. The timestamp will look like: 2022-07-06-231402.
Restoring the Database
Now that we have a timestamped backup of the database living in S3, we would like to configure DevSpaces to load this database backup. We want to add the following to our .gitpod.yml, after starting MySQL.
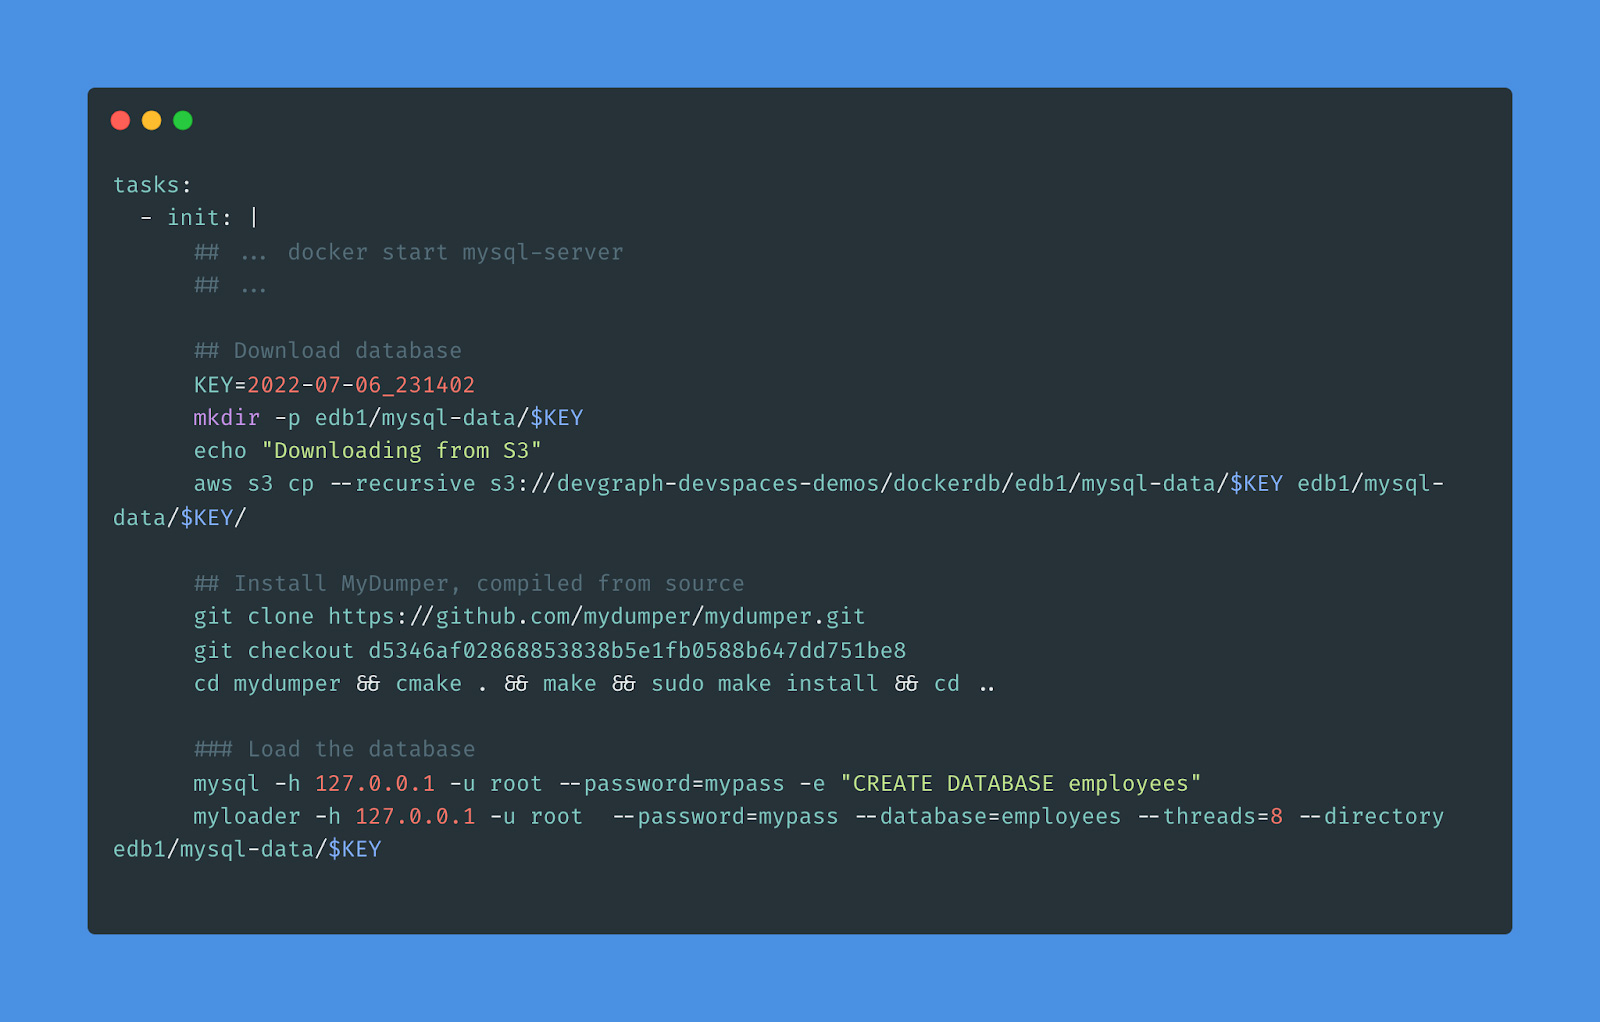
Note that we are setting the variable KEY to the timestamp from the previous step. This identifies the backup that we want to restore. We run the aws s3 cp command to download the database backup. Note that since both DevSpaces and S3 are in the same AWS region, the transfer time is extremely fast.
Next, we install a recent copy of mydumper. For this tool, it is best to build from source using a pinned version. This step takes about 10 seconds.
Finally, we create the database and run the myloader command to restore the database. Starting a DevSpace and loading a test database takes less than one minute. Considering that this includes pulling a mysql Docker container, compiling MyDumper, pulling 1GB from S3, and loading the data into the database, this is remarkably fast. For a 10gb database image, this takes about 6 minutes. Note that there are further optimizations that can be done which can reduce load times.
Demo Repository
See: https://github.com/stephenVertex/demoPyMysql for a functioning demo of this approach. To use this, you will need to:
- Fork the repository
- Setup your own AWS credentials as environment variables
- Update the S3 paths in the .gitpod.yml and backupDatabaseToS3.sh files.
Please give it a try and let me know how it goes!